
Create an Atlas ISO
On this page
Atlas Manager can create a Windows ISO containing Manager, the Atlas playbook, and your setup preferences. Use it for a fresh installation on this PC or another one.
Beta
ISO creation and USB writing are beta features. Test the ISO in a virtual machine before using it on a PC, and back up your files before reinstalling Windows.
Atlas is applied after Windows setup and sign-in. The destination PC still needs internet access, Windows and Store updates, administrator approval, and the Windows Security checks. Creating the ISO does not install Atlas on the PC making it.
1. Choose your files
Open Atlas Manager and choose Create an Atlas ISO. Allow administrator access, then select:
- An unmodified Windows 11 25H2 x64 ISO from Microsoft’s Windows download page, containing a supported edition. Check the version offered before downloading; a newer feature release is not automatically compatible with Atlas 0.6.
- The Atlas 0.6 playbook (
.apbx). - A new output filename on a local NTFS or ReFS drive with enough free space.
Choose Check files. Manager checks the Windows release, available editions, and working space. Home, LTSC, 24H2, and Insider images are not supported. Media with existing custom setup files is also rejected.
Your original ISO is kept. If the output filename already exists, choose another name.
2. Set Windows and Atlas preferences
Choose whether the ISO is for This PC or A different PC, then enter the local account name to create. Windows will ask you to set that account’s password after reinstalling.
For this PC, you can include its Wi-Fi and Ethernet drivers. Choose installed drivers, or check Windows Update for matching drivers first. This does not save your Wi-Fi password. For another PC, have that device’s network drivers available separately.
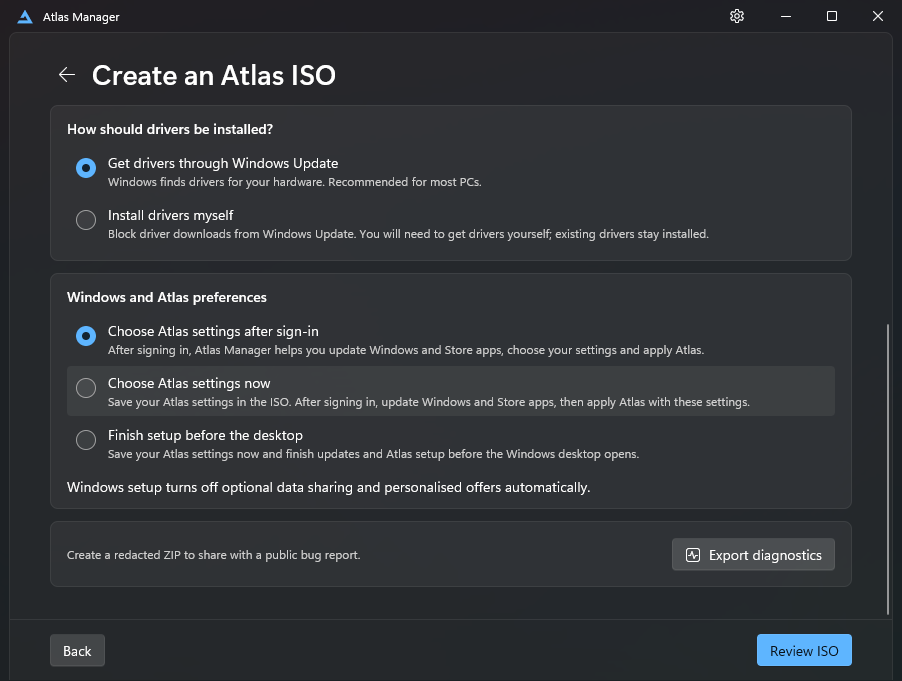
Choose how the destination PC should get drivers, then select an Atlas setup mode:
| Mode | What happens on the destination PC |
|---|---|
| Choose Atlas settings after sign-in | Manager opens after sign-in so you can prepare Windows and choose your settings. |
| Choose Atlas settings now | Your choices are saved in the ISO. After sign-in, finish update preparation and apply Atlas with those choices. |
| Finish setup before the desktop | Saved choices are used in a full-screen setup window after sign-in, before you start using the normal desktop. Update and security checks still require your attention. |
The before-desktop mode is not unattended installation. When no operation is running, Continue in Windows lets you return to Windows if needed.
3. Review and create
Choose Review ISO. Check the source files, included editions, account name, target PC, and driver settings. Then choose Create ISO.
Keep Manager open while it copies files, adds Atlas, creates the ISO, and verifies the result. Wait for Your ISO is ready before using it.
4. Create an installation USB
Choose Create installation USB from the completed ISO screen. To use an ISO you already have, choose Create a USB from an existing ISO in Manager’s media flow.
- Connect a USB drive and refresh the list.
- Select it, then choose Review USB.
- Check the drive’s model, capacity, volumes, and serial number.
- Back up anything on that drive, acknowledge the erasure, then choose Erase and create USB.
- Keep the drive connected until Manager confirms Your USB is ready. Choose Eject USB before unplugging it.
The selected USB drive will be erased
Writing the USB permanently removes all of its files and partitions. This beta writer creates media for UEFI x64 PCs, using up to 32 GB of the drive. Any remaining capacity is left unallocated.
5. Install Windows and finish Atlas setup
Boot the destination PC from the USB using its UEFI boot menu. Install a supported Windows edition that matches your licence. Carefully check the destination drive before changing partitions.
After Windows setup, follow the password and sign-in prompts for your local account. Connect to the internet when Manager opens. If no network adapter is available, install the network driver you saved earlier.
Complete Manager’s update preparation and Windows Security checks, then apply Atlas. Use Restart and continue whenever preparation requests it, and Continue updates after signing back in. Restart after Atlas installation finishes, then follow First setup.
If media creation or setup fails
Use Export diagnostics on the ISO, USB, or installation page before retrying. An interrupted USB is not ready to use; create it again. See installation troubleshooting for reporting steps.